The Microsoft Teams Event Monitor monitors and alerts based on aspects of your Teams assets like channel creation/deletion, channels with no owners, team membership, and more. This article will show you how to configure the settings for a new Teams Event Monitor!
Before beginning the setup instructions below, please ensure that you've first taken the steps found here to set up an Azure authentication profile with FrameFlow.
Note: this event monitor performs many checks on your Teams channels. By default, we only monitor the first 100, and while you can change this setting, be advised that the more channels you monitor, the more it will cost to run this event monitor. If you need to monitor more than the first 100 channels, consider scrolling to the bottom of the event monitor settings and making the monitoring time out longer.
To begin, choose the level of alert you want to receive if the event monitor cannot contact Azure.
 Connection Alert Settings
Once you've finished that, select the level of alert that will be triggered if new channels are detected since the last time the event monitor ran. You can also choose an alert level for when channels are removed.
 Channel Addition or Removal Options
The next option sends you an alert if the event monitor detects a channel with no owner.
 No Owner Alerting Option
Use the next option to receive an alert if a channel has had no activity in a specified number of days. Once selected, another option will appear that lets you choose not to alert about channels with no activity at all.
 Channel Activity Option
The next two options send alerts if a channel has less or more than the number of members you specify, respectively.
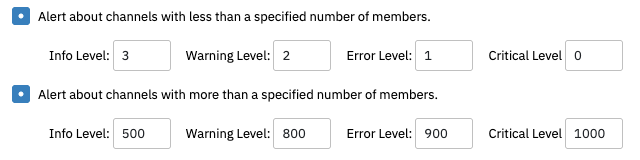 Member Number Options
Under "Options", there are check boxes that let you decide the information you want to include in the event text generated each time the event monitor runs. Here, you can choose whether or not you want a table of all Teams channels included in the event text generated each time the event monitor runs. You can also choose to monitor only a fixed number of channels, which may help lessen the costs associated with running this event monitor.
 Options Settings
The final options control the teams and channels that will be included or excluded from monitoring. Under "Only check the following teams", enter a list of teams with each new value on a new line. The teams you enter here will be the only ones monitored. If you prefer, you can use the next option to create a list of teams to ignore. Make sure to enter the name of each team on a new line in the text box. The same options are available for your Teams channels, as seen below:
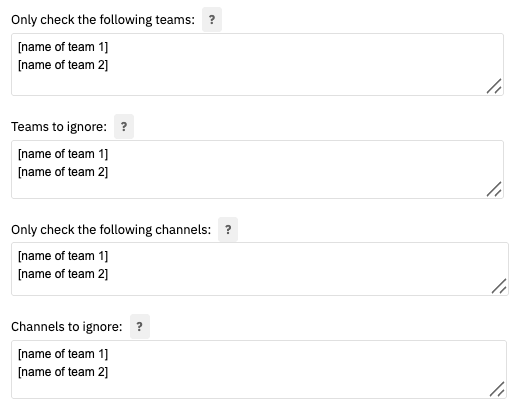 Inclusion/Exclusion Options
This tutorial took you through the configuration process for your Microsoft Teams Event Monitor. In need of more documentation on this monitor? Check out its Technical Resources guide. For more help with Azure app registrations, check out our Creating an Azure Authentication Profile walkthrough.
More IT Monitoring Features