FrameFlow's device finder makes onboarding new network devices a breeze. This feature saves you valuable time that would have been spent manually onboarding tens or hundreds of devices. It's especially useful when just starting out to get a large monitoring configuration up and running very quickly. Read on to find out how to take advantage of this feature. To view a series of event monitors that automatically perform device discovery round-the-clock, click here.
The device finder works slightly differently in multi-site mode, but we'll begin with device discovery in single-site mode. You can find the device discovery tool in the Tools section of your FrameFlow installation. When there, choose the method you want the finder to use when searching for new network devices. By default, the finder will scan a specified range of IP addresses using ping requests. Enter the IP range you want to scan, then choose a name format and start the scan. You'll receive a list of detected devices to choose from once the scan is complete.
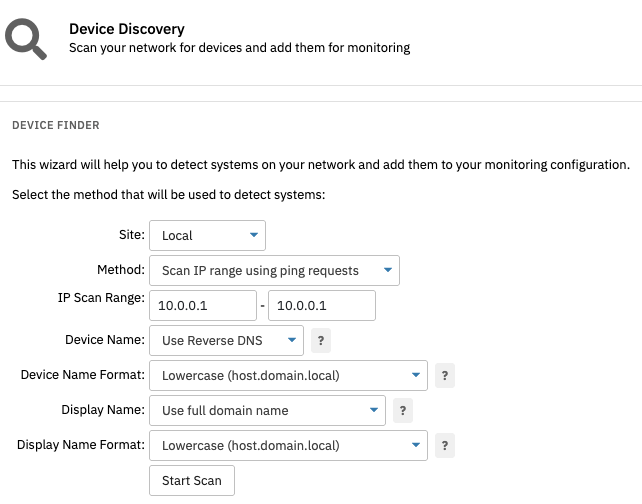 IP Range Scan Method
Regardless of the scanning method you choose, some users find it helpful to designate a folder for newly discovered devices to automatically enter. This lets you go back later and organize your new devices into your existing hierarchical structure.
You can also scan for network devices using SNMP. Selecting this method lets you enter an IP range, the version of SNMP you're using, port number, and other credentials depending on what SNMP version you use. After that, you'll be prompted to choose the way your devices will be named internally and externally, as well as their name format.
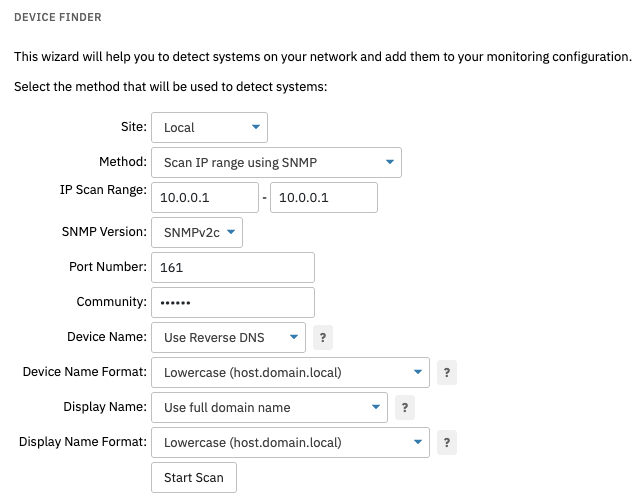 Scanning Based on SNMP
The third option is for Windows-centric environments. It lets you import devices straight from Active Directory. Enter the address of a domain controller on the network and a search base, then enter your username/password combination for Active Directory. Choose whether or not you want to skip computers marked as "disabled" in AD.
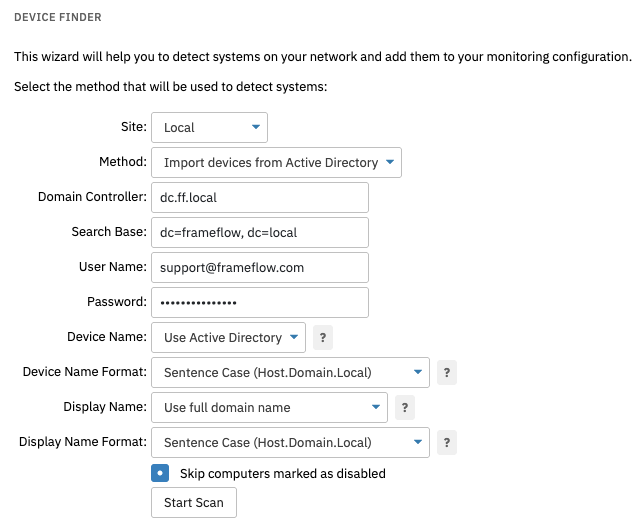 Active Directory Scan
When you hit "Start Scan", the device finder will return a list of devices found in Active Directory and label each one as either a new device or one that already exists in your monitoring configuration. Regardless of the scan mode you choose, you'll be presented with a list of discovered devices which indicates any devices that are already within your monitoring configuration.
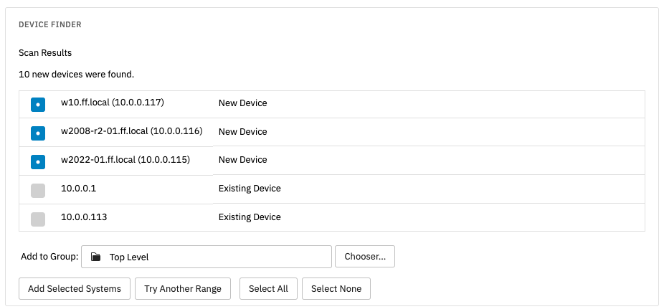 List of New and Existing Devices
In multi-site mode, users must select the site they want the device finder to search before configuring any other settings. Once you've done this, you can configure all other settings as normal. Choosing "local" will run the scan on your main FrameFlow console.
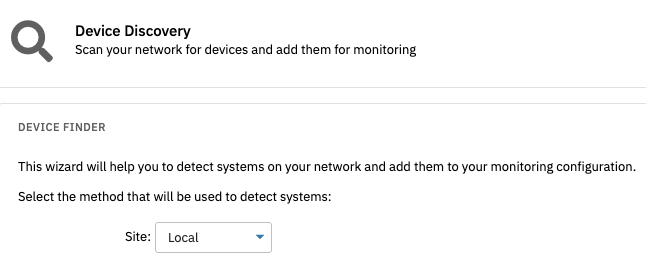 Site Chooser
Choosing any of your remote sites will take you to the screen you see below:
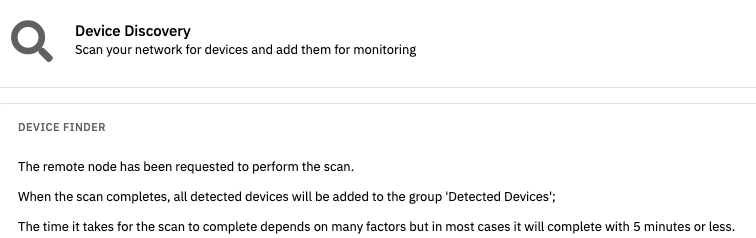 Multi-Site Scan Screen
As you can see, the scan will proceed as normal but the new devices the scan detects will be automatically placed in a folder called "Detected Devices". Unlike with local scans, there will be a small delay between launching the scan and retrieving your new devices.
 Automatically Created Detected Device Folder
This tutorial introduced you to the device finder feature and taught you how to use it. For automated round-the-clock onboarding of new devices, check out our discovery event monitors. We upload new tutorials like this one to the Features page regularly, so stay tuned to find out what else we can do for your monitoring configuration.
More IT Monitoring Features