Device widgets are custom controls or display that can be found on the status page of network devices. They display information and allow you to perform actions directly from the status page. In this tutorial, you will learn how to use device widgets with your network devices.
Widget profiles let you select a group of widget settings and give them a name. You can assign widget profiles to your devices. The profile will control which widgets are shown on the status tab and when you hover over devices in network diagrams.
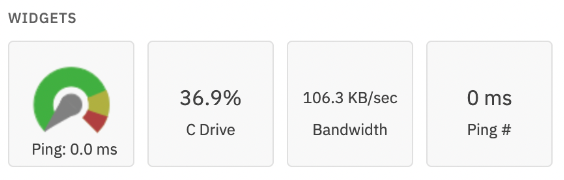
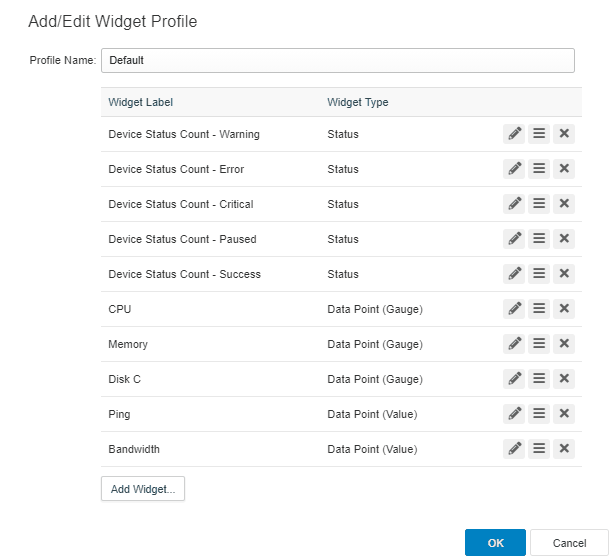
The default widgets available for network devices are CPU usage, C drive usage, memory, bandwidth, and ping response time. The widget profile is set to default on a clean installation of FrameFlow. Profiles can be edited in the settings tab of the network device. You can also change widget profiles using the bulk actions menu in spreadsheet views. To mass-assign widget profiles, right-click on a network device group to set a widget profile for the entire group.
In the settings section of FrameFlow, select "Device Widgets". Here, you can change the default profile or create your own from scratch. You don't have to worry about which widgets make sense with which devices, because if a widget does not apply, it won't show up on that network device. To create a new widget profile, click "Add New Profile". In the window that appears, you can give a name to your custom widget profile to distinguish it.
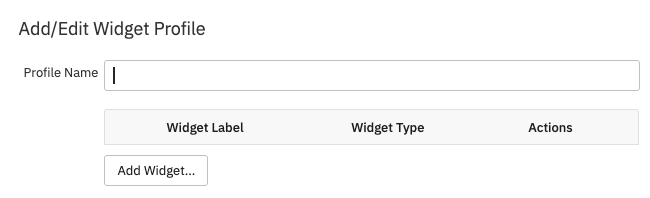 Adding a Widget Profile
Choosing "Add Widget" will open the Widget Chooser, which allows you to select a type and style, as well as a label. You can label your widget anything you want. The label will appear under the widget when it is displayed on the status page.
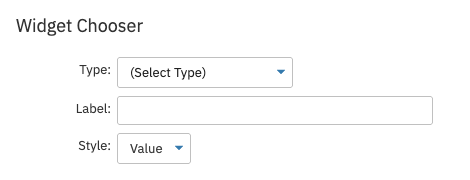 Widget Chooser
The widget style can either be a value or a gauge, depending on your purposes.
 Value Widgets and Gauge Widgets
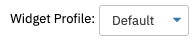
Once you have customized your widget profile to your liking, click "OK" on both the widget chooser and the window called "Add/Edit Widget Profile". Now, back in Network Devices, you will be able to choose between the default widget profile and the one you just created.
In the Settings section of your network device, the dropdown called "Widget Profile" will now contain your custom profile as well as the default. After you have changed the profile, remember to click "Save Changes" to apply them.
 Widget Profile Chooser
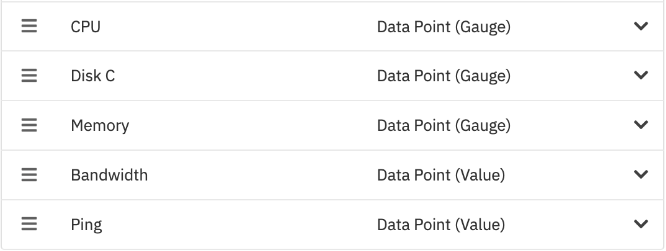
Widgets will show up in the order that they are defined. You can rearrange them after adding them by clicking on the hamburger icon in the "Add/Edit Widget Profile" menu to drag and drop them into the desired order.
 Moving Widgets into Desired Order
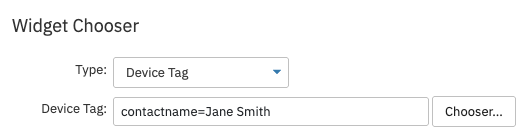
Widgets have special support for tags in the Widget Chooser menu. Choose "Device Tag" from the dropdown menu labeled "type". From here, you can either type in the tag you would like associated with your widgets, or use the chooser menu to select a tag.
In this menu, you can only choose the class of tag, i.e. "contactname". To finish the job, save your changes and go to the Settings section of your network device. Here, you can add the entire tag you would like to designate, i.e. "contactname=Jane Smith".
This tag will appear underneath the device widgets, making it easy to distinguish who to contact if something goes wrong. You can also use this feature to keep the service tags and serial numbers for your devices handy.
 Device Tag Widget Menu
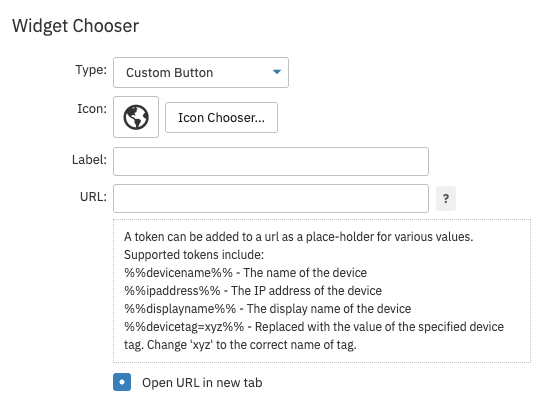
Another type of widget you can assign to your network devices is a custom button. Choose "Custom Button" from the dropdown menu in the Widget Chooser. You can specify an icon and a label for your button, then add a URL.
If you click on the question mark beside the URL field, you will see tokens you can implement instead of a full URL. The system will automatically replace these tokens with the address of the device you specify. This way, for example, you don't have to remember the specific IP addresses of the boxes you would like to access.
Common uses for custom buttons are to link to the web interface for a switch or router or to link to the technical support page of the device's manufacturer.
 Custom Button Menu
Custom data points are a flexible type of widget that allows you to display any sort of data applicable to your network device. This way, you can bring important device-specific information to the forefront of your status page.
In the Device Widgets section of Settings, add a new widget from the Widget Chooser called "Custom Data Point". First, select an event monitor. You can select any data point that the event monitor is tracking. This data point will show up on the devices associated with this event monitor as a custom data point widget. Choose a label and display type for the widget, then save your changes. The network devices associated with your event monitor will now have that widget.
 Custom Data Points
There is limited space to display the widget's label, so it may be beneficial to keep the label under ten characters or so. Clicking on the widget will display a small graph next to it, which tracks the data point you have chosen over time. You can add as many custom data points to your devices as you want.
Keep in mind that custom data points are site-specific, so if you have a multi-site installation of FrameFlow, you must select a single site in the "Scope" dropdown menu in widget settings.
In this tutorial, we explained how device widgets work. We showed you how to create and assign widget profiles, as well as how to set up custom widgets. Keep up on new tutorial posts in the next few days by checking the Features section of FrameFlow.
More IT Monitoring Features