Tickets are freeform records of administrative actions used to keep track of changes made to your systems. Use them to keep everyone on your team up to date on what you have changed and why. In this tutorial, we will show you how to efficiently use tickets to record and assign, and solve monitoring issues.
In the Tickets section of FrameFlow, click on "Actions" and select "Add Ticket". This will open a window where you can begin writing your ticket.
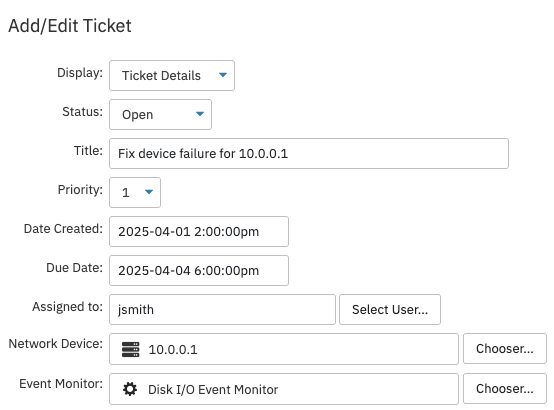
The default status for your ticket is "Open", but you can change it to whatever status matches your needs with the dropdown menu. Add a title with a brief description of the action you performed or plan to perform. You can also select a priority value between 1 and 10.
The date and time will be set to the time you created the entry, but you can change them to reflect a past or future action. Enter the name or login account of the targeted user under "Assigned To" and add any notes about the action you've performed in the text box at the bottom.
 Adding a New Ticket
To associate an entry with a device or event monitor, choose them using the chooser functions provided.
Once you've added your first entry, it will show up in the list of all tickets. Tickets are flexible and freeform, allowing you to use them for things like software updates, hardware updates, notes on how certain systems are performing, or whatever suits your needs.
Adding Custom Ticket Fields
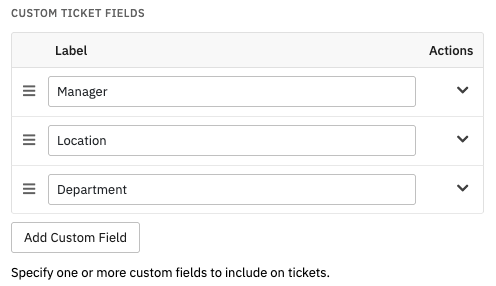
In FrameFlow's Settings section, there's a subsection for Ticket Settings. There, you can add custom fields to the template you see when you create or edit a ticket. Alongside the regular "Assigned To", "Due Date", and "Status" fields, you can create fields like "Department", "Contact Name", "Manager", or anything else that will help your further categorize your tickets. Once you create a custom field, it will be available in all existing and future tickets. Next to each custom field will be a text box to enter details in. Whenever you need to, you can return to the Ticket Settings to edit, delete, or rearrange your custom fields.
 Custom Field Settings
Tickets Across FrameFlow's Interface
You can access our ticketing function in several sections of our interface, chiefly the Tickets section. There, you can view and manage all tickets. You can edit tickets here by clicking the Actions menu next to the desired ticket and selecting "Edit Ticket". In the resulting menu, you can change the ticket's description, due date, priority, and any other aspects you need to edit.
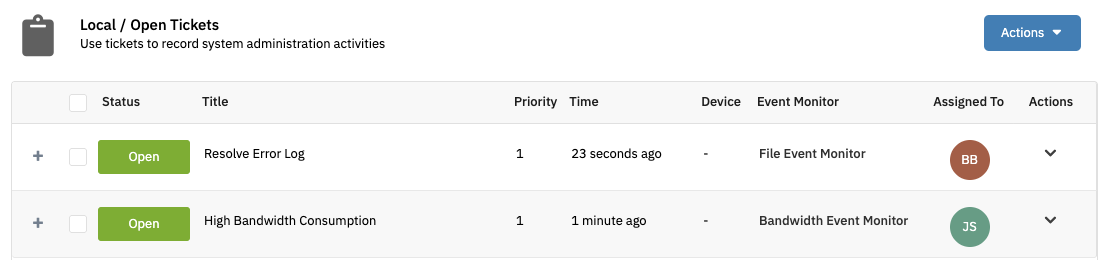
As we mentioned earlier, the Headquarters section is where you can assign tickets to current issues and view a list of assigned tickets further down.
 Assigning a Ticket from Headquarters
You can also view tickets in the Network Devices section of FrameFlow. There, you can choose a network device and click on the Tickets tab to see all tickets related to the device. The same option is available in the Event Monitors section, where you can view all tickets associated with the chosen event monitor.
 A Network Device with Ticket Entries
Completed Tickets
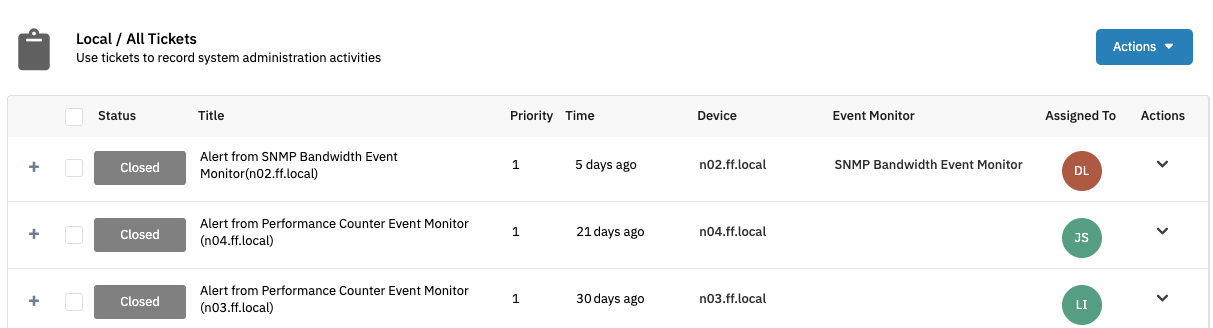
FrameFlow also keeps record of all completed tickets, meaning you can revisit problems that have been resolved to retrace the steps needed to fix them. Imagine that you have an issue that you know you've seen before, but it keeps recurring every once in a while. With the ticket history, you can review what was done previously to solve the issue and maybe even prevent this issue from recurring in the future.
 Completed Tickets
In this tutorial, we showed you how to use tickets to record and assign IT admin actions performed by you and your staff members. We also went over how to associate specific entries with a network device. We also showed you how to search through tickets for a specific entry using the filtering feature. Stay tuned for more tutorials on related subjects!
More IT Monitoring Features