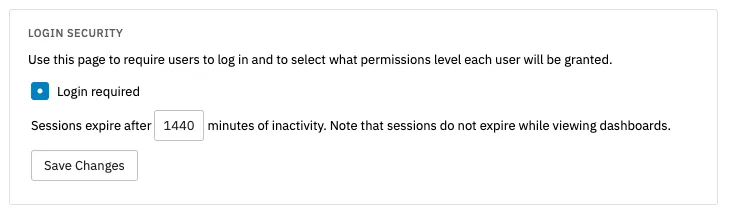
One of the first things you should do with your new FrameFlow installation is to create a login and set what permissions you will allow each user to have. Go to FrameFlow's settings and select the Login and Security Settings. Upon checking the box called "Login Required", a menu called "Groups" will appear. The default groups, Administrators and Everyone, allow you to sort members of your team into administrator and non-administrator roles, but you can add your own groups later. For now, scroll down to the users section and add your first account.
 Adding Your First Login
The window that pops up prompts you to choose a login type, a username, and a password. Choose the standard login option, then input the username and password you would like to use for this primary admin account. There are also textboxes for your first and last names and your email. Once you create your first account, you'll be automatically logged out of FrameFlow. When this happens, just log back in with the account you just created. This only happens the first time you create an admin account.
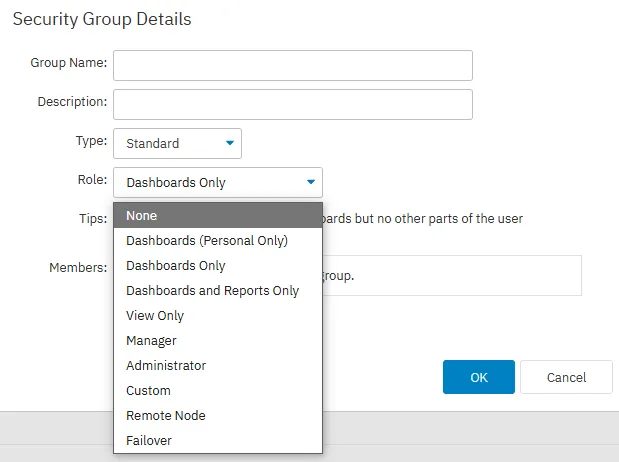
Once you have created this first account, you can go back to the settings tab to add more accounts with different roles. To do so, you'll be creating a new group. Clicking "Add Group" will open a window called "Security Group Details" where you can give the new group a name and a description, as well as select a role for those added to the group. This controls what the members of the group will be able to see and manipulate.
With the "Dashboard Only" role, users can access the dashboard section of the interface but no other sections. The "Dashboards (Personal Only)" option allows users in the group to see only personal dashboards. When marked as personal, a dashboard is available only to the logged in user and not any other users.
"Dashboards and Reports Only" allows the users to see the dashboards and reports section respectively, but hides everything else. Both of these options let the users see the content of those pages, but not to change them. "View Only" allows users to see everything in the FrameFlow interface, but they cannot make any changes. The manager role has full access to all features in the interface, with the exception of the Login and Security settings. The administrator role can access everything on your installation of FrameFlow, including login and security.
 Group Role Options
When installing a remote node, use an account with the "Remote Node" role. This separates the remote node users from all other users. Accounts with the remote node role can be used when installing a remote node for multi-site monitoring. They cannot be used to log into the FrameFlow interface.
The "Failover" role is used in combination with our Failover provisions. It allows failover servers to connect to the master installation. To learn more about FrameFlow's failover provisions, click here.
When installing a failover node, use an account with the "Failover" role. This separates the failover node users from all other users. You can only use failover node role accounts when setting up a failover server.
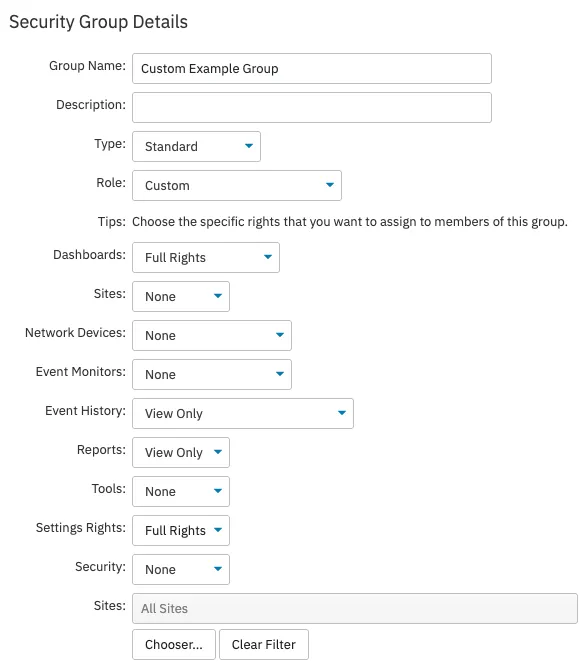
You can also create a custom role, which opens a robust set of options that let you specify exactly what users will be able to see and edit.
 Custom Security Group Options
Use the dropdown menus next to each option to tailor your interface for your custom group users. You can choose what they can and cannot see, as well as what they can and cannot change on your interface. If you are using a multi-site installation, here is also where you can specify what sites your custom group users can access. You may want to separate your users based on what site they are monitoring. Whatever additional access you grant users in this group will only apply to the sites you have selected.
For more information on custom roles and multi-site logins, check out our documentation on multi-site login security.
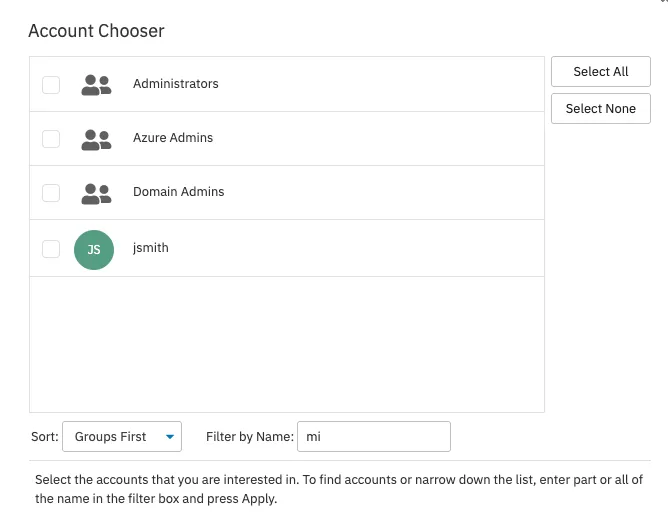
Once you have chosen a security group or created a custom group, you can add users. To do so, click the pencil icon next to the group to access the group settings. Click the "Account Chooser" button to select users to add to your group. When a group member logs in, they will be granted the permissions you have selected for the group. Anything they are not allowed to access will be hidden.
 Account Chooser Menu
In versions of FrameFlow after v2024.5, you also have the option to add groups as members of other groups. This allows you to nest security groups with different permissions which adds extra flexibility if you need to change group permissions as time passes. For more information on this and other important login security details, refer to our knowledge base article on Advanced Login Security.
Up until now, we have only discussed standard logins, which are managed by FrameFlow itself. You can also use Windows-integrated login, which is managed by Windows. Selecting this option will let you input your Windows username and will authenticate your password with Windows instead. The test login feature is especially useful here, allowing you to check your username and password before creating the account.
Another type of externally-managed login we offer is through SAML. The "SAML Login" option lets users with SSO enabled require single sign-on for their users. We've also added a SAML section and a new tutorial that introduces FrameFlow's support for SAML. Check it out!
The last login type is called Active Directory Group Members, which is also authenticated by Windows. With this login type, you can add users to an Active Directory group, where any valid login belonging to that group will be authenticated. This type lets you assign the same rights to everyone within an Active Directory group.
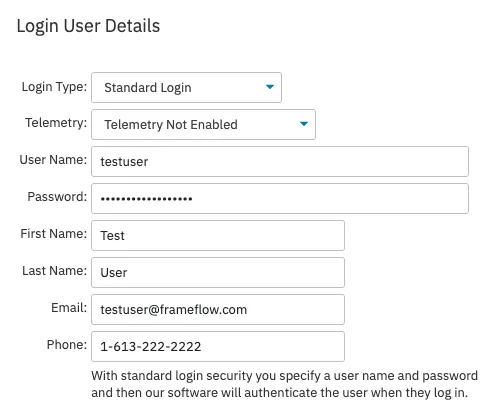 Login User Details
Two-factor authentication adds another level of security when logging into FrameFlow. Instead of requiring just a username and password upon login, two-factor authentication also requires the input of a code that is sent to your phone. Next to the list of users in Login and Security settings, there is a column called "2FA", which stands for two-factor authentication. Two-factor authentication is enabled by individual users after they have logged into FrameFlow.
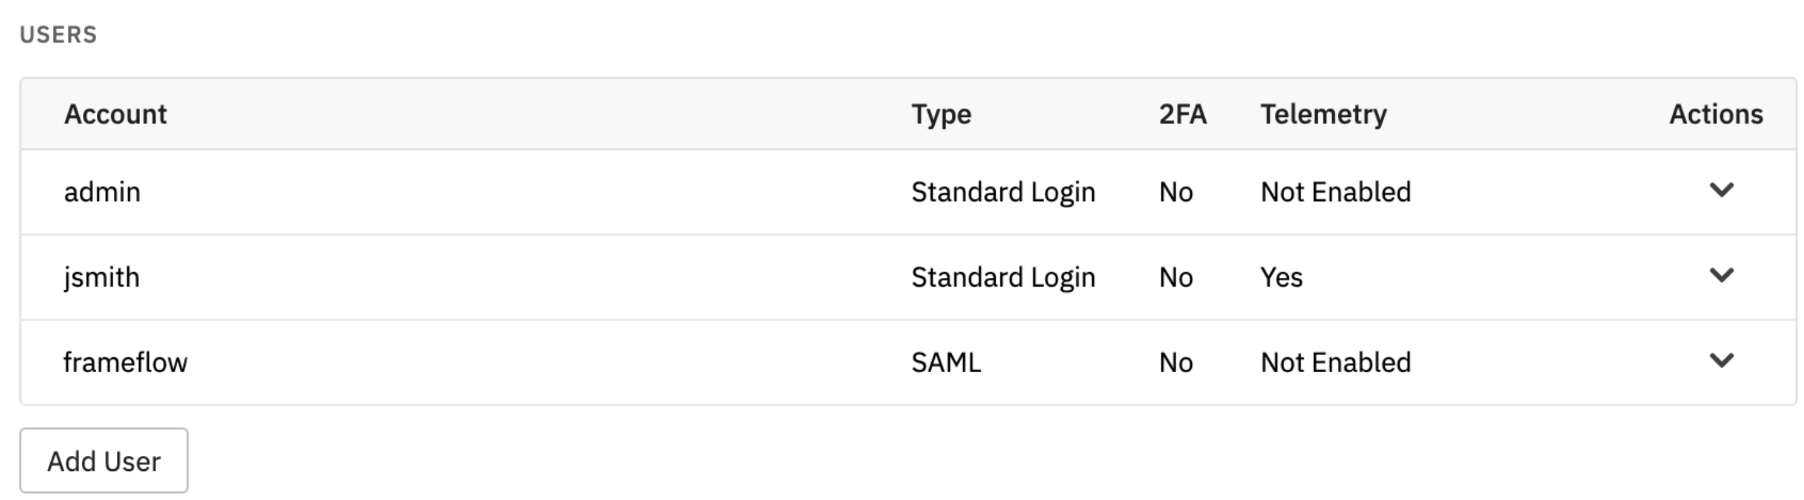 Two-Factor Authentication in Users Menu
In this tutorial, we went over how to set up your first administrator account and create additional accounts thereafter. We taught you about default groups, how to create custom groups, and how to assign roles. We also went over login types and a bit about two-factor authentication. Make sure to check out our Two-Factor Authentication tutorial for more information. Refer to our Login Security Event Monitor reference guide for more documentation on this event monitor. Stay tuned for new tutorials coming soon!
More IT Monitoring Features